
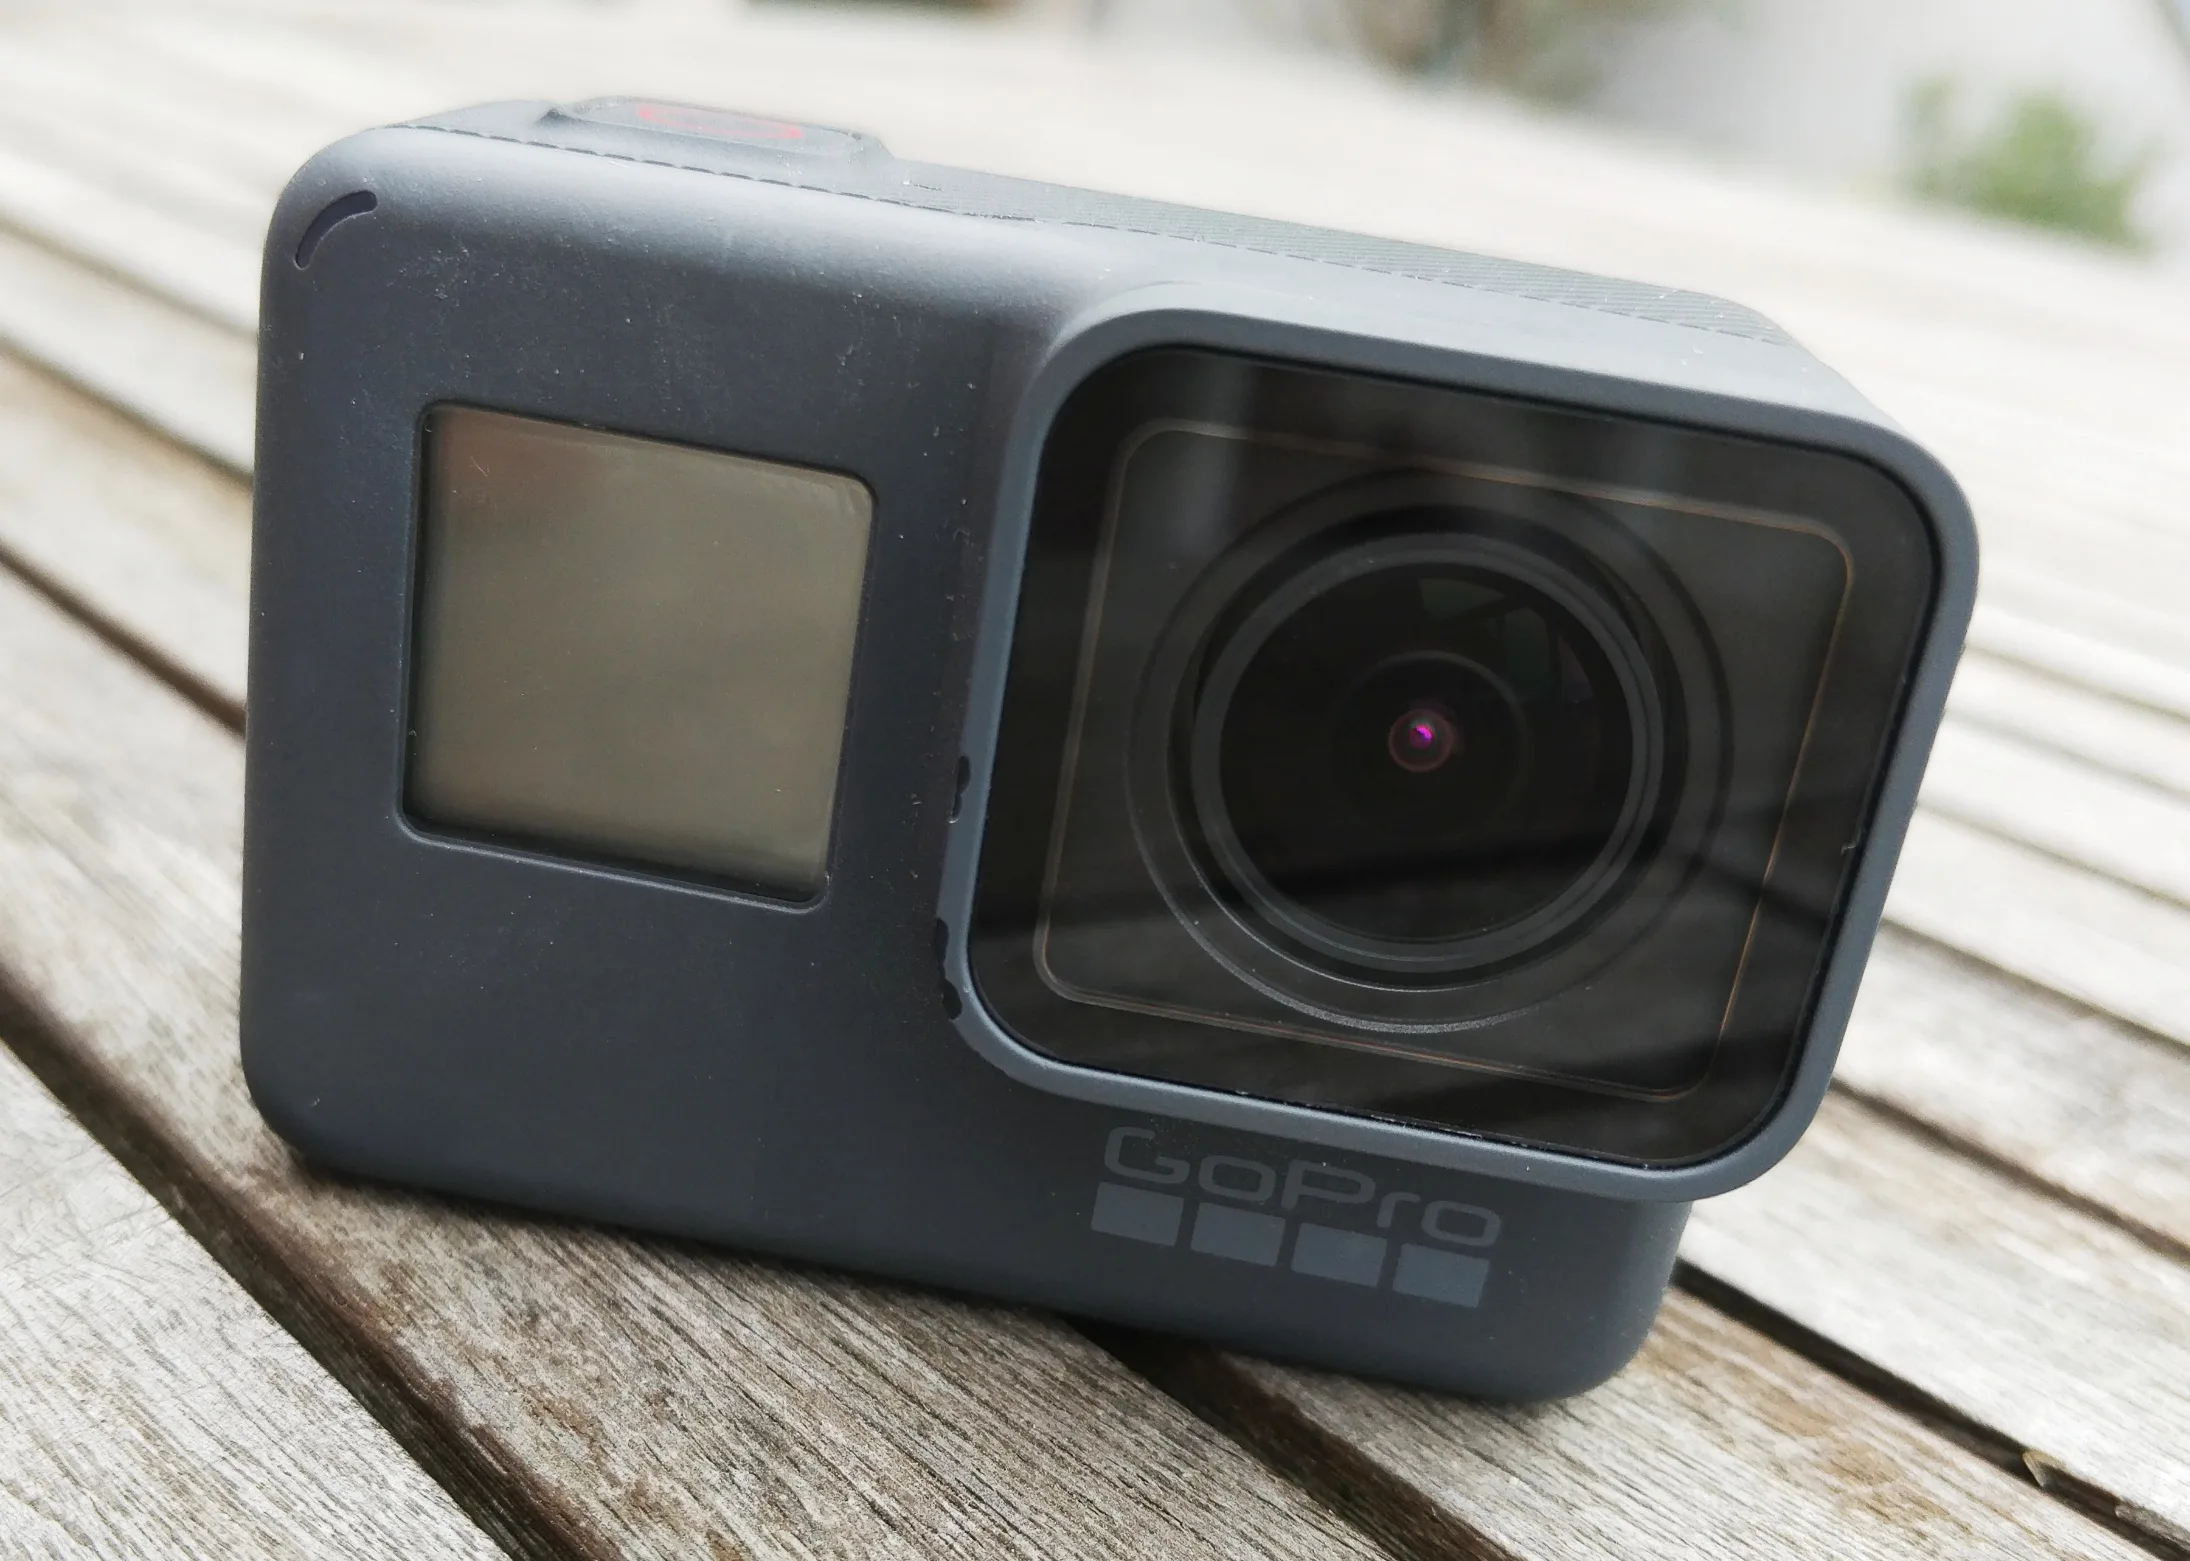
If you are stuck at home like me and have some old gear lying around you might wonder what you can do with it to put it to some use. Maybe you got no webcam for your video calls, but you have an old GoPro. Most websites and videos say you need a capture card to make this work. But that’s not true. There are some special applications out there, too that achieve it, but they will set you back some bucks.
So, is it possible to use a GoPro as a webcam without a capture card and with free tools only? The short answer: Yes, it is! After some tinkering, I got a basic setup running. The only caveat is that there is a slight delay but on the bright side: You can use your old GoPro not only as a webcam but for streaming and recording via OBS Studio, too.
What you need:
- A GoPro obviously… (supported are GoPro HERO7 Black, HERO5 (incl. Session), HERO4 (incl. Session), HERO+, HERO3+, HERO3, HERO2 w/ WiFi BacPac as far as I know. Be sure to have the latest firmware installed!)
- FFmpeg
- OBS Studio
- OBS-VirtualCam Plugin (for webcam use)
Optional:
Let’s start:
- Install OBS Studio
- Install OBS-VirtualCam Plugin
- Install FFmpeg or extract the binaries into a folder of your choice e.g. C:/FFmpeg
- Connect your computer to your GoPro’s WiFi (I needed several tries before my PC actually connected to my GoPro. If it doesn’t open the GoPro Quik application on your PC and try again.)
- Open following URL in your browser:
http://10.5.5.9/gp/gpControl/execute?p1=gpStream&a1=proto_v2&c1=restart
This will start your GoPro’s stream. It’s the same that you see on your smartphone once it is connected to your GoPro. - Open the folder where FFmpeg is located in a command prompt and execute the following line:
ffmpeg -fflags nobuffer -f:v mpegts -probesize 8192 -i udp://10.5.5.100:8554 -f mpegts -vcodec copy udp://localhost:10000
This creates a new local stream from your GoPro’s stream.
On Windows: Be sure to allow the network connection of FFmpeg through your firewall: Check both private and public as your GoPro’s WiFi is by default a public WiFi! - Open OBS Studio and add a new Media Source with the following settings:
Uncheck Local File
Input: udp://@:10000
Input Format: mpegts - You should be all set and see your GoPro’s video stream in OBS Studio now. Go to Tools>VirtualCam and hit Start. Be happy and use your GoPro as a Webcam. :)
Optional (preferred) method:
- Do steps 1-4 from above.
- Additionally, install Python and download the script from the link above and place it in the folder where FFmpeg is located
- Open the script in a text editor and edit line number 43 to be: STREAM=True
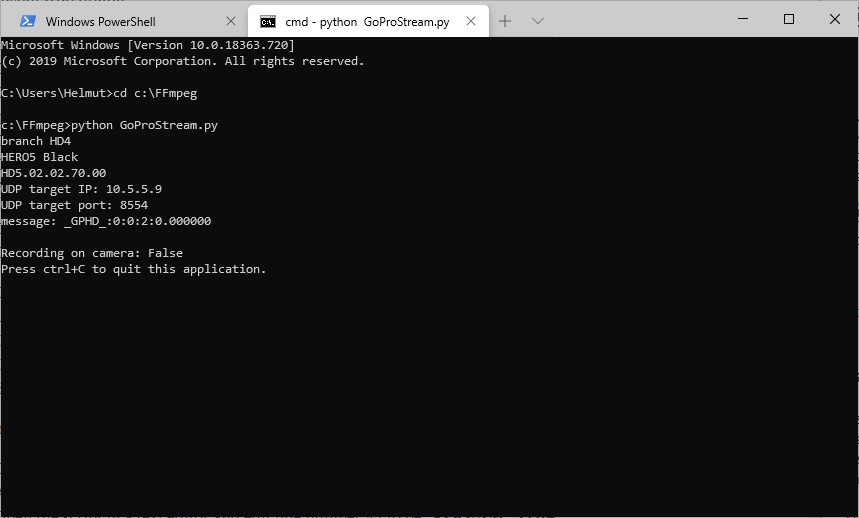
- Start the script in a command shell via:
python GoProStream.py
The script handles the connection to your GoPro and starts FFmpeg for you. - Continue at step 7 from above.
Voila, you got yourself a GoPro Hero Webcam. :D
Let me know in the comments if this works for you or if you got any problems following this guide!


Thanks for this info, I have been doing the exact same thing during my lockdown.
The problem I have is connecting to something like Zoom or Teams which needs me to be connected to my router wifi, not the gopro network.
How did you get around that? Are you using two network connections on your computer?
I’m thinking I might need to connect to my router through ethernet cable.
Thanks,
Richard
Hey Richard,
You are correct, I’m using two network connections and connected my computer to the router via ethernet cable.
All the best,
Helmut
Cool, thanks, sounds great. I will definitely try that anytime soon. Is there a delay, or could you use that Gopro video feed in a multi cam environment with other cameras connected e.g. via USB and still be in sync?
C.
Unfortunately there is a delay but you might be able to use it as an overview camera. Note that the audio signal from your microphone will be very off in that case so it would be best if you don’t see people speak. You could also use it to show something outside or similar where audio-video-sync is not really important.
how do you connect to gopro wifi?
You connect as you would with any other Wifi. Just be sure the GoPro Wifi is turned on. I had to try several times before the PC connected to the camera.
Hi ,
What if I wanna connect it to a Mac with a cable rather than wifi?!
Is it possible ?!
There is a software from GoPro that you can use for USB connection to do that but you have to pay for it. If you wanna connect it with an HDMI cable you need a capture card.
Does this support GoPro Hero 5 Black? It was not stated above. Thanks.
Hey Godinus,
I tested the method when I wrote the article on a Hero5 Black – so yes.
I think I followed the instructions pretty well, but it’s not working for me. When I open the 10.5.5.9 URL in my browser, am I supposed to be seeing my GoPro Live feed? Because the page is just white for me. That’s the only spot I feel may be the problem. My Wifi seems to be connected to the GoPro Wifi correctly and the live feed does work with the GoPro app on my iphone. I am using Google Chrome with Windows 10. I also did check both boxes to make sure ffmpeg is working with private and public networks. Thanks!
Hey Billy,
The 10.5.5.9 URL described in the article doesn’t show the live feed. It’s just the commando for your GoPro to start streaming. You can try viewing the stream via VLC player using one of the following source URLs: udp://10.5.5.9:8554 or udp://10.5.5.100:8554
I hope this helps. :) Good luck!
Hi! I think this is best tutorial on how to use a GoPro as a webcam for free, no dongles or special cables, just a wifi connection. Anyway, I must be doing something wrong because I can’t get it to work. I followed carefully each step and tried with and without the script. It starts with the command line just pasting the long line. http://10.5.5.9/gp/gpControl/execute?p1=gpStream&a1=proto_v2&c1=restart shows me a Status “0” on the browser. OBS shows only a black screen. My GoPro Hero 5 Black is in live mode. I tried disconnecting the ethernet cable but it’s the same, I get no image. Firewall is checked and the wifi connection is public. If I click the link 10.5.5.9 while on OBS I see CMD shows the lines pasted below (and it goes on). Really don’t know what’s going wrong. Can you please help me?
[mpegts @ 000001d391abcfc0] Packet corrupt (stream = 0, dts = 0).
[mpegts @ 000001d391abcfc0] Packet corrupt (stream = 0, dts = 78078).
[h264 @ 000001d391ad37c0] left block unavailable for requested intra mode
[h264 @ 000001d391ad37c0] error while decoding MB 0 3, bytestream 80896
[h264 @ 000001d391ad37c0] concealing 1507 DC, 1507 AC, 1507 MV errors in I frame
[mpegts @ 000001d391abcfc0] Packet corrupt (stream = 0, dts = 195195).
[mpegts @ 000001d391abcfc0] Packet corrupt (stream = 0, dts = 207207).
[mpegts @ 000001d391abcfc0] Packet corrupt (stream = 0, dts = NOPTS).
Hey Charlie,
Status 0 is actually correct. Did you start OBS after you initialized the GoPro. Did you try to restart the PC after installing the webcam plugin? If not can you please try it again?
Kind regards,
Helmut
I’ll copy the entire CMD in case it’s useful. I tried disconnecting the USB cable from the GoPro just in case, and got different values in CMD, but still no image on OBS =(
F:\ffmpeg\bin>ffmpeg -fflags nobuffer -f:v mpegts -probesize 8192 -i udp://10.5.5.100:8554 -f mpegts -vcodec copy udp://localhost:10000
ffmpeg version git-2020-06-28-4cfcfb3 Copyright (c) 2000-2020 the FFmpeg developers
built with gcc 9.3.1 (GCC) 20200621
configuration: –enable-gpl –enable-version3 –enable-sdl2 –enable-fontconfig –enable-gnutls –enable-iconv –enable-libass –enable-libdav1d –enable-libbluray –enable-libfreetype –enable-libmp3lame –enable-libopencore-amrnb –enable-libopencore-amrwb –enable-libopenjpeg –enable-libopus –enable-libshine –enable-libsnappy –enable-libsoxr –enable-libsrt –enable-libtheora –enable-libtwolame –enable-libvpx –enable-libwavpack –enable-libwebp –enable-libx264 –enable-libx265 –enable-libxml2 –enable-libzimg –enable-lzma –enable-zlib –enable-gmp –enable-libvidstab –enable-libvmaf –enable-libvorbis –enable-libvo-amrwbenc –enable-libmysofa –enable-libspeex –enable-libxvid –enable-libaom –enable-libgsm –disable-w32threads –enable-libmfx –enable-ffnvcodec –enable-cuda-llvm –enable-cuvid –enable-d3d11va –enable-nvenc –enable-nvdec –enable-dxva2 –enable-avisynth –enable-libopenmpt –enable-amf
libavutil 56. 55.100 / 56. 55.100
libavcodec 58. 93.100 / 58. 93.100
libavformat 58. 47.100 / 58. 47.100
libavdevice 58. 11.100 / 58. 11.100
libavfilter 7. 86.100 / 7. 86.100
libswscale 5. 8.100 / 5. 8.100
libswresample 3. 8.100 / 3. 8.100
libpostproc 55. 8.100 / 55. 8.100
[mpegts @ 0000016e536de840] Unable to seek back to the start
Last message repeated 1 times
[mpegts @ 0000016e536de840] Packet corrupt (stream = 0, dts = 1372371).
[mpegts @ 0000016e536de840] Packet corrupt (stream = 0, dts = NOPTS).
[mpegts @ 0000016e536de840] Packet corrupt (stream = 0, dts = 1657656).
[mpegts @ 0000016e536de840] Packet corrupt (stream = 0, dts = 1660659).
[mpegts @ 0000016e536de840] Packet corrupt (stream = 0, dts = 1714713).
[NULL @ 0000016e536f0d40] non-existing PPS 0 referenced
[h264 @ 0000016e536f0d40] non-existing PPS 0 referenced
[h264 @ 0000016e536f0d40] decode_slice_header error
[h264 @ 0000016e536f0d40] no frame!
[mpegts @ 0000016e536de840] Stream #0: not enough frames to estimate rate; consider increasing probesize
[mpegts @ 0000016e536de840] decoding for stream 0 failed
[mpegts @ 0000016e536de840] Could not find codec parameters for stream 0 (Video: h264 ([27][0][0][0] / 0x001B), none): unspecified size
Consider increasing the value for the ‘analyzeduration’ (0) and ‘probesize’ (8192) options
[mpegts @ 0000016e536de840] Could not find codec parameters for stream 1 (Audio: aac ([15][0][0][0] / 0x000F), 0 channels): unspecified sample format
Consider increasing the value for the ‘analyzeduration’ (0) and ‘probesize’ (8192) options
[mpegts @ 0000016e536de840] Could not find codec parameters for stream 2 (Unknown: none ([128][0][0][0] / 0x0080)): unknown codec
Consider increasing the value for the ‘analyzeduration’ (0) and ‘probesize’ (8192) options
Input #0, mpegts, from ‘udp://10.5.5.100:8554’:
Duration: N/A, start: 15.248567, bitrate: N/A
Program 1
Stream #0:0[0x1011]: Video: h264 ([27][0][0][0] / 0x001B), none, 90k tbr, 90k tbn
Stream #0:1[0x1100]: Audio: aac ([15][0][0][0] / 0x000F), 0 channels
Stream #0:2[0x200]: Unknown: none ([128][0][0][0] / 0x0080)
Output #0, mpegts, to ‘udp://localhost:10000’:
Metadata:
encoder : Lavf58.47.100
Stream #0:0: Video: h264 ([27][0][0][0] / 0x001B), none, q=2-31, 90k tbr, 90k tbn, 90k tbc
Stream mapping:
Stream #0:0 -> #0:0 (copy)
Press [q] to stop, [?] for help
[mpegts @ 0000016e536de840] Packet corrupt (stream = 0, dts = 1846845).
[mpegts @ 0000016e536de840] Packet corrupt (stream = 0, dts = 1933932).
[mpegts @ 0000016e536de840] Packet corrupt (stream = 0, dts = 1999998).4.2kbits/s speed= 5.4x
[mpegts @ 0000016e536de840] Packet corrupt (stream = 0, dts = 2036034).7.0kbits/s speed=3.68x
[mpegts @ 0000016e536de840] Packet corrupt (stream = 0, dts = NOPTS).
[mpegts @ 0000016e536de840] Packet corrupt (stream = 0, dts = 90090).
[mpegts @ 0000016e536de840] Packet corrupt (stream = 0, dts = 150150).42.1kbits/s speed=1.82x
[mpegts @ 0000016e536de840] DTS 90090 < 2036034 out of order
[mpegts @ 0000016e5378ac00] Non-monotonous DTS in output stream 0:0; previous: 663663, current: 663663; changing to 663664. This may result in incorrect timestamps in the output file.
[mpegts @ 0000016e536de840] Packet corrupt (stream = 0, dts = 162162).19.0kbits/s speed=0.0212x
[mpegts @ 0000016e536de840] Packet corrupt (stream = 0, dts = 201201).
[mpegts @ 0000016e536de840] Packet corrupt (stream = 0, dts = NOPTS).895.8kbits/s speed=0.0234x
[mpegts @ 0000016e536de840] Packet corrupt (stream = 0, dts = 600600).
[mpegts @ 0000016e536de840] Packet corrupt (stream = 0, dts = NOPTS).163.7kbits/s speed=0.0245x
[mpegts @ 0000016e536de840] Packet corrupt (stream = 0, dts = 834834).
[mpegts @ 0000016e536de840] Packet corrupt (stream = 0, dts = 951951).23.6kbits/s speed=0.0367x
[mpegts @ 0000016e536de840] Packet corrupt (stream = 0, dts = 972972).43.7kbits/s speed=0.0438x
[mpegts @ 0000016e536de840] Packet corrupt (stream = 0, dts = 1027026).
[mpegts @ 0000016e536de840] Packet corrupt (stream = 0, dts = NOPTS).814.2kbits/s speed=0.048x
[mpegts @ 0000016e536de840] Packet corrupt (stream = 0, dts = 1252251).
[mpegts @ 0000016e536de840] Packet corrupt (stream = 0, dts = 1354353).7.7kbits/s speed=0.0494x
[mpegts @ 0000016e536de840] Packet corrupt (stream = 0, dts = 1444443).4.2kbits/s speed=0.0561x
[mpegts @ 0000016e536de840] Packet corrupt (stream = 0, dts = 1507506).7.5kbits/s speed=0.0591x
[mpegts @ 0000016e536de840] Packet corrupt (stream = 0, dts = 1564563).0.5kbits/s speed=0.0617x
[mpegts @ 0000016e536de840] Packet corrupt (stream = 0, dts = 1600599).9.5kbits/s speed=0.0635x
[mpegts @ 0000016e536de840] Packet corrupt (stream = 0, dts = 1783782).
[mpegts @ 0000016e536de840] Packet corrupt (stream = 0, dts = 2015013).2.4kbits/s speed=0.0659x
[mpegts @ 0000016e536de840] Packet corrupt (stream = 0, dts = 2120118).1.4kbits/s speed=0.071x
frame= 24 fps=0.1 q=-1.0 size= 2821kB time=00:00:28.76 bitrate= 803.6kbits/s speed=0.0777x
For some reason command prompt is stuck at
D:\ffeme\heh\bin>ffmpeg -fflags nobuffer -f:v mpegts -probesize 8192 -i udp://10.5.5.100:8554 -f mpegts -vcodec copy udp://localhost:10000
ffmpeg version git-2020-06-28-4cfcfb3 Copyright (c) 2000-2020 the FFmpeg developers
built with gcc 9.3.1 (GCC) 20200621
configuration: –enable-gpl –enable-version3 –enable-sdl2 –enable-fontconfig –enable-gnutls –enable-iconv –enable-libass –enable-libdav1d –enable-libbluray –enable-libfreetype –enable-libmp3lame –enable-libopencore-amrnb –enable-libopencore-amrwb –enable-libopenjpeg –enable-libopus –enable-libshine –enable-libsnappy –enable-libsoxr –enable-libsrt –enable-libtheora –enable-libtwolame –enable-libvpx –enable-libwavpack –enable-libwebp –enable-libx264 –enable-libx265 –enable-libxml2 –enable-libzimg –enable-lzma –enable-zlib –enable-gmp –enable-libvidstab –enable-libvmaf –enable-libvorbis –enable-libvo-amrwbenc –enable-libmysofa –enable-libspeex –enable-libxvid –enable-libaom –enable-libgsm –disable-w32threads –enable-libmfx –enable-ffnvcodec –enable-cuda-llvm –enable-cuvid –enable-d3d11va –enable-nvenc –enable-nvdec –enable-dxva2 –enable-avisynth –enable-libopenmpt –enable-amf
libavutil 56. 55.100 / 56. 55.100
libavcodec 58. 93.100 / 58. 93.100
libavformat 58. 47.100 / 58. 47.100
libavdevice 58. 11.100 / 58. 11.100
libavfilter 7. 86.100 / 7. 86.100
libswscale 5. 8.100 / 5. 8.100
libswresample 3. 8.100 / 3. 8.100
libpostproc 55. 8.100 / 55. 8.100
Also I tried the python version which gives me nothing as it just opens then close in a second.
What exactly do you mean with “it just opens then close in a second”? Did you use the python command in an open command line window? Which GoPro do you have?
How can I connect it to my PC? As I only have cables and my motherboard doesnt have wifi.. But I do have a HDMI-microHDMI cable. Is there a way I can connect it without capture card? My PC does not have wifi/wifi dongle.
Hey John,
If you got a Hero 8 Black there will be a PC utility made available from GoPro to use it as a webcam via USB. It is currently only available as a beta for MAC OS but will be available for PC in the future. Here is the link: https://gopro.com/en/us/news/how-to-use-gopro-for-webcam
Otherwise I am sorry – without WiFi or capture card unfortunately I cannot help you.
Hi Helmut,
I have a GoPro hero 8 that I was able to connect to my pc with wifi but When I try to launch the stream via Crome it returns with a 500 internal server error.
Please help I need to have a working webcam and I cannot wait until GoPro releases the windows patch.
{
“version”: “6.00”,
“path_info”: “execute”,
“query_string”: “p1=gpStream&a1=proto_v2&c1=restart”,
“error_code”:-3,
“error_msg”: “500 Internal Server Error
“,
“function”: “gpcontrol_cgi_handler”,
“line”: 190
}
Different GoPro models have different APIs. The unofficial GoPro 8 API documentation is still not available. You could try the GoPro 7 commands and let me know if they work for you. See https://github.com/KonradIT/goprowifihack for more details.
Hi, I followed all the steps. I have a Gopro Hero 5 Session. I’m connected to the camera wifi and I also have ethernet connected too. I get “{“status”:”0″ }” when clicking on the link. I followed the rest of the steps and I don’t get any feed in OBS. I saw it come up for a short second but it was very distorted and laggy. I’m getting lines like this in CMD:
[mpegts @ 000001bfc458da80] Packet corrupt (stream = 0, dts = 2174172).0.4kbits/s speed=0.127x
Is this normal? I’m not sure what I’m doing wrong.
Thanks!!
Hey Tanner,
The Session models behaves a bit different than the Black. Did you try the script?
The information from https://github.com/KonradIT/goprowifihack/blob/master/HERO4/HERO4-Session.md also relates to HERO5 Session:
The GoPro HERO4 Session on Firmware 2.00 works a bit differently when it comes to streaming. You still use the same methods explained in the Livestreaming doc but you need to HTTP GET the status URL http://10.5.5.9/gp/gpControl/status until the status:31 (number of clients connected) is set to a value above 0 (>=1). Then the feed will be live in UDP port 8554. Refer to this python script on a real world example.
Is there are reason why the HERO6 BLACK isn’t supported?
I’ve tried to get the stream to work on the 6, but it’s very unreliable. The one time I did get the stream to work, it was super blocky and couldn’t really be used.
Unfortunately I only got a Hero5 Black and cannot investigate the issue. :-/ The APIs are not publicly available through GoPro – it’s a hack and the results can therefore vary.
Hi I’ve been using your methods to try to get this set up and I put in the command prompt for python correctly but it says something different after everything it says on your command prompt picture. It says: ‘ffplay’ is not recognized as an internal or external command, operable program or batch file. Please get back as soon as possible thank you in advance
The ffmpeg exe files have to be located in the same folder as the script for it to work.
Hi, I tried the second method (the one with python) but when I run the GoProStream.py using cmd (like the picture you showed) nothing happens and then I get no image on OBS. I have a GoPro Hero3+ Black Edition. Thx
Hey Maru,
Does the script return any message at all or an error?
Hello,
I’m trying to connect my gopro hero4 session with your tutorial.
Actually, I’m blocked at step 4
“Connect your computer to your GoPro’s WiFi (I needed several tries before my PC actually connected to my GoPro. If it doesn’t open the GoPro Quik application on your PC and try again.)”
My GoPro is connected via wireless on my windows laptop, and my GoPro IP is 10.5.5.100 (in my connexion manager, I confirm my wireless card is connected to my Go Pro).
This link doesn’t work for me :
http://10.5.5.100/gp/gpControl/execute?p1=gpStream&a1=proto_v2&c1=restart
Opening this url in a browser print me an error message “ERR_CONNECTION_REFUSED” (I’m using Chrome to run this test, because Firefox only print “failed to connect” error message).
What do you think I could do to makes it work ?
Furthermore, Pairing my go pro with the iOS App is OK, but when I try the previous URL in Safari I can’t see anything.
I’m using Windows 10 up to date (19041.508).
Regards,
Hi,
Apparently the Hero 4 Session works a bit different as other GoPros. Can you try the hacks as described in
https://github.com/KonradIT/goprowifihack/blob/master/HERO4/HERO4-Session.md and if that doesn’t work here is another one to hack the firmware:
https://github.com/KonradIT/hero4hack
Let me know if that works!
hi, i ran the python script and it outputs the video to a window for about 3-5 seconds (pretty smooth) and then it freezes and never recovers
cmd output: https://lew.la/paste/c3d17361
then it outputs this eternally:
[http @ 000001f589d3bec0] Opening ‘http://10.5.5.9:8080/live/amba.m3u8’ for reading
[hls @ 000001f587416d40] Skip (‘#EXT-X-VERSION:3’)sq= 0B f=1/1
[hls @ 000001f587416d40] Skip (‘#EXT-X-ALLOW-CACHE:NO’)
Hi !
Yeah this code works, but I have 20s latency when I use my GoPro Hero Session as a webcam… Then I give up !
I will try later the other github URL, I’m a little sad bit the result.
Thanks for answering.
Regards,
Hey Hugo,
Sorry to hear that – 20s latency is A LOT! I only ever had a second or so at most.
Hello Helmut,
first of all, thanks for the tutorial!
But can you help me?
I dont have a wifi module on my desktop, can i get it to work using the USB connection?
Hi Gabriel,
If you got a Hero8 Black or Hero9 Black you can download the GoPro webcam software. You will find everything you need on this page: http://gopro.com/webcam
If you got an older model and your PC hasn’t got WiFi you will need a capture card unfortunately.
Hope this helps!
Kind regards,
Helmut
Hello,
I followed all the steps but when I open OBS and run the new source, it doesn’t connect to the GoPro.
Please help.
Thanks,
Sush
“Open the folder where FFmpeg is located in a command prompt and execute the following line:
ffmpeg -fflags nobuffer -f:v mpegts -probesize 8192 -i udp://10.5.5.100:8554 -f mpegts -vcodec copy udp://localhost:10000
This creates a new local stream from your GoPro’s stream.”
Hello, I can’t make this… could you be more specific on where do I do it and how? I dont understand how it goes…
I’m having terrible trouble to connect my GoPro Hero8 as a webcam to OBS though I have connected it to another Macbook, I’m trying to figure out if the problem is solved with the installation of ffmpeg … PLEASE HELP I’m quite desperate!
Hey,
Unfortunately I don’t have a Mac. So this was for Windows machines. Please have a look at http://ericholsinger.com/install-ffmpeg-on-a-mac to get ffmpeg on Mac up and running. I hope that helps!
Kind regards,
Helmut
awesome guide for getting up and running.
however, I have encountered a problem.
when I run the python command, either from the command line or file explorer, the stream opens up, but on your picture on this guide, it doesn’t show an image.
so, what I am wondering, is how can I make it so the python script just starts the stream but doesn’t actually join it.
Any help is appreciated, and if it helps, i have a gopro hero 3 black.
Did you edit the script as mentioned in step 3: “Open the script in a text editor and edit line number 43 to be: STREAM=True”?
Yes, I have definitely changed line 43 to STREAM=True, so I have no idea why this is working.
* isnt working
My desktop PC doesn’t have integrated WiFi. The only network connection it has is a LAN cable connected to the router.
From what I understand of step 4, the GoPro connects to your PC via WiFi. Am I correct then in assuming that if a PC, like mine, doesn’t have integrated WiFi, it can’t integrate into OBS as a webcam?
Unfortunately I believe so. If you have a newer GoPro (Hero8 and later) you can use the provided webcam software from GoPro: https://community.gopro.com/t5/en/How-to-Use-Your-GoPro-as-a-Webcam/ta-p/665493/
Otherwise your best bet is to get a capture card unfortunately. They got really cheap in the last years.
what could be the best settings in obs for ms team or zoom meetings using hero5black ? to reduce the latency and etc?
Hm not sure about that. I got about half a second delay with my Hero5 Black. I set the cache in OBS to minimum. Maybe that helps but be aware that you might experience dropped frames because of that.
Hoping you can help me. I have managed to connect to my GoPro Hero3. I can see and hear the stream after running the script, the script seems to run fine but I cannot get OBS to see the stream at all. Do you think It would be helpful to have appropriate port forwarding in my router?
Port forwarding on the router is used for access from outside the network. Is OBS installed on a machine outside of your network? Then yes.
Otherwise have a look at your firewall settings on your PC and try allowing the port there.
I am having the same problem as Connor was. I have edited the line 43 to STREAM=True, and I still have a window that pops up with the video and sound, but the virtualcam won’t find it.
Sorry that it doesn’t work for you. Which GoPro do you use? Try posting an issue on Github: https://github.com/KonradIT/GoProStream
I successfully connected to the webcam via wi-fi, but when I try to browse http://10.5.5.9/gp/gpControl/execute?p1=gpStream&a1=proto_v2&c1=restart i get “ERR_CONNECTION_TIMED_OUT”. What am I doing wrong? I currently have a Hero 6 white.
Unfortunately I don’t own a Hero 6 to test it and it isn’t listed in the supported cameras section. Please post an issue on Github: https://github.com/KonradIT/GoProStream
Why we can’t use usb connection for streaming from gopro hero 3+ black ? Why only wifi?
That’s a question you should ask GoPro, not me. ;)
Hi,
Is there a way to adjust the resolution? Screen quality I get from my Hero Session 5 using this method is not great at all.
I don’t think you can change the resolution, sorry.
Hello,
Everything works fine as per instruction but how to increase the bitrate because I see some fragments in the vide stream from time to time.
Thank you!
Hi,
I don’t think that the bitrate is changeable as the API which is used to achieve all this is built into GoPro’s firmware. If you find a solution, please let me know and I will edit the post for others to see. Thanks!
Hello,
As Said At the Top WE Need FFmpeg But when I go to the website there’s sooo many different “Builds” Witch One Do I Download?
Thank You,
Choose the platform you are on (Windows, MacOS or Linux), then choose a link of a download mirror, finally try the link to the latest version from the download mirror you chose.
it is working. thanks
Namastae Helmut, Thank you very much for useful knowledge. I have gopro7 silver and I tried 1st method you mentioned above and work fine but have to refresh the link. In second method, there was blackscreen appear like command prompt. Can you help me to solve it without refreshing the link or with second method.
Hello Chandra,
Can you tell me which link needs to be updated?
in second method , “branch hero3H18.03.02.10.00 ” is the output when i run python GoProStream.py .
For problems with the script please file an issue directly at GitHub under https://github.com/KonradIT/GoProStream as I am not the maintainer of the repository.
Thank you , i have issue file at https://github.com/KonradIT/GoProStream